Saturday, February 9, 2013

Valentine's Day Blog Hop


Welcome to the Valentine's Day Blog Hop!
We are glad that you could join us!
We are celebrating Valentine's day with projects that were made without the traditional colors of pink or red.
If you happened upon my page and would like to join in from the beginning, please visit Suzanne at http://www.zannieberry.blogspot.com
If you have come from Anita's blog them you are in the right place.

The grand prize today is being sponsored by Zannie Berry Scrapbooking. (www.zannieberry.blogspot.com)


In order to win, make sure to comment at each stop along the way!

It is not required that you become a follower of each blog, but we would love if you did!

The project I am sharing with you is a gift I made for my boyfriend, Robert.
He loves penguins.
Last year I crocheted him one.
This year I decided to make him a unique one out of sequins!


This cute little guy started out as just a plain styrofoam ball.
I then took sequins pins, added white seed beads and white sequins.
I pinned them in an oval onto the ball to make the stomach area.
I covered the rest of the styrofoam ball with sequins pins with black seed beads and black sequins.


I then cut the feet and beak out of orange felt.
The wings I cut out of black felt.
I adhered them to the penguin with plain sequins pins.
I attached google eyes with glue dots.


I hope you enjoyed my project!

Your next stop in the hop is Claire at http://threewaterscreations.blogspot.com/

Blop Hop Line Up


Sunday, February 3, 2013

Felt Bookmarks

What goes great with a book club?
How about cute handmade bookmarks?!
I made these for the ladies that are starting a book club with me!


I hand drew a pattern for the lips.
I used a mustache pattern from Scraptastical Kreations' KISS This and That set
(www.scraptasticalkreations.com)

I traced each pattern onto felt.
I then simply cut the felt out.
Using permanent makers, I drew a few accents on each bookmark.
I then cut coordinating ribbon.
Using my sewing machine, I sewed the ribbon into place on the bookmarks.

Can't wait to give these out at book club!

Saturday, February 2, 2013

A Gift for my Sweetheart Blog Hop


Welcome to “A gift for my Sweetheart” blog hop.


Sit back and relax while you browse through 17 unique handmade gift ideas to give a loved one on Valentine’s Day. Each stop along the way has a gift they poured their heart into but that doesn’t mean the project contains the traditional Valentine heart theme.

The hop started at Christine’s blog http://hotberrydesigns.blogspot.com/ if you didn’t come from Http://papershenaniganz.blogspot.com
 be sure to start at the beginning so you don’t miss out on the inspiring ideas.

For this hop we have 2 sponsors, in order to be entered in the drawing for the 2 prizes you must comment and follow each blog.


Hot Berry Designs
$10 gift certificate


Scraptastical Kreations
$15 gift certificate

You have Saturday and Sunday to hop and leave a comment at all the blogs for your chance to win. The winners will be randomly chosen Monday Jan 4th  and will be announced on Christine’s blog http://hotberrydesigns.blogspot.com/


Robert and I like to keep a weekly menu.
We are trying to eat healthier and this helps us stay on track.
It also helps us with planning grocery shopping trips and staying within budget.
So, for my project, I created something for the both of us for Valentine's Day.
I created a Valentine's theme background for our menu.


The menu is made from a 12x12 frame.
Glass works great with dry erase markers, so this works great as a menu that you can change the background on!

I started with a fun, vintage Valentine's paper for the background.
I then placed a red square of cardstock in the center to have a solid section.
This solid section really helps when writing on the menu, making it a lot easier to read.
I had love themed alphabet stickers that I used to created the titling "Menu".


I stamped kissing deer onto a tag.
I colored the little hearts on the back with a red marker.
I tied the tag with white and gold twine.


Vintage looking cardstock adorns the lower left corner.
Cardstock sticker punch out reads "LOVE".
Gold sequins ribbons runs to the right and above of the sentiment.
Vintage little Valentines girls are decorating the sentiment "LOVE".


Thank you for stopping by the next stop is Claire at http://threewaterscreations.blogspot.com/


Lissa Marie  www.somanycrafts.com


Wednesday, January 30, 2013

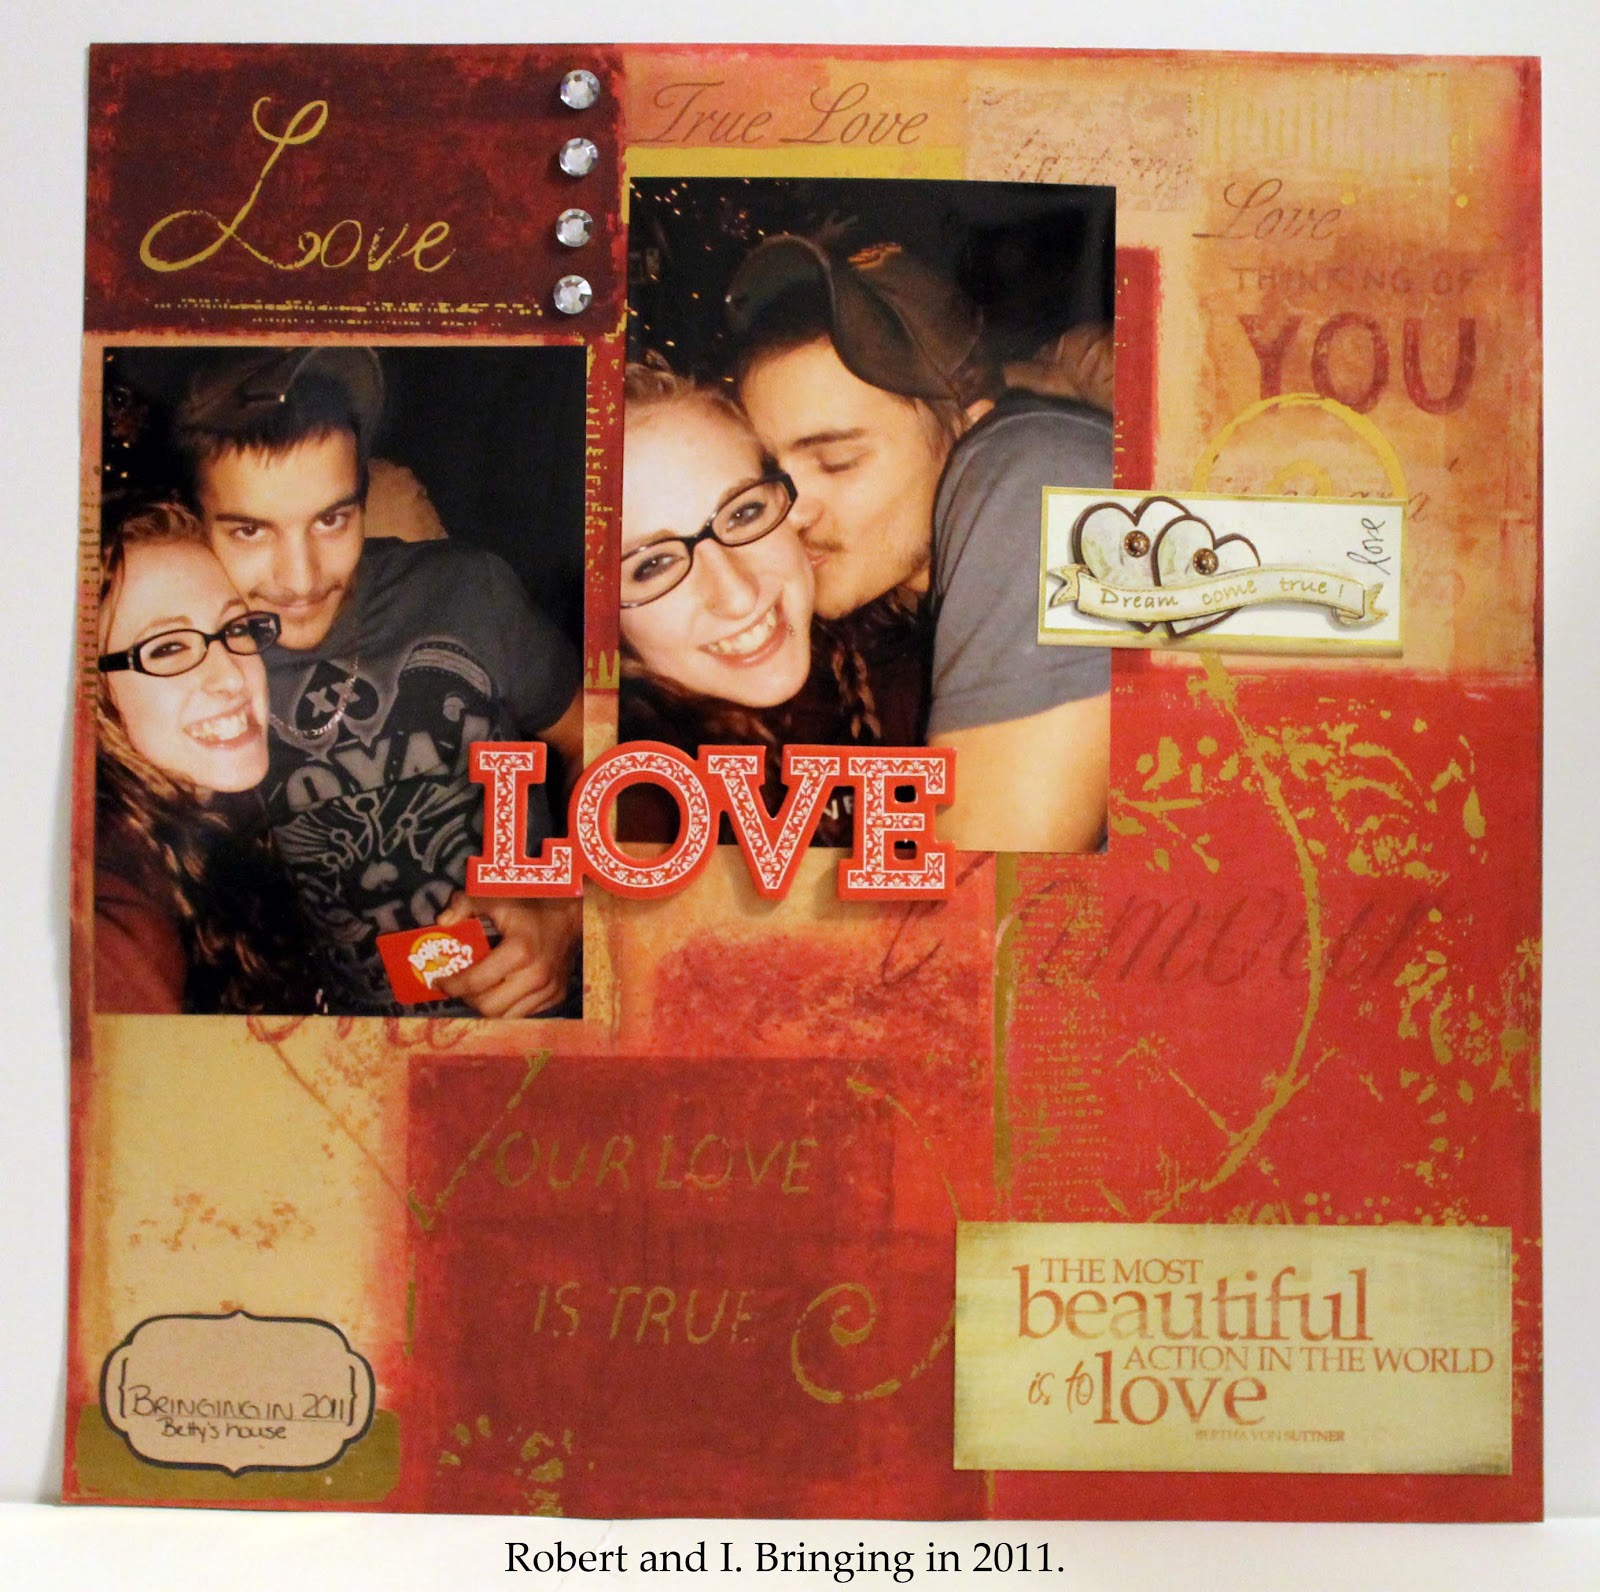
Scrapbooking Page - Bringing in 2011

I have A LOT of scrapbooking to catch up on!
The page I am sharing with you today is one that I created using pictures from New Year's 2011.


I love those two pictures of us!
You can tell how happy we are!
The scrapbook paper was beautiful as it was, in shades of red and gold,
with gold sentiments
I situated the two pictures using the block like gradients as guides.
I added three clear rhinestones at the top to make the sentiment "Love" stand out.
I added a chipboard cutout across both pictures, "Love".
I added a sentiment to the bottom right "The most beautiful action in the world is to love".
I added a three dimensional sticker coming off of one of the pictures.
"Dreams come true"
I added a tag in the bottom right, "Bring in 2011. Betty's house."

Tuesday, January 29, 2013

Wine Charms

Wine charms can be very expensive and it can be hard to find really cute one!
I love making jewelry and work well with beads and wires...
so I though, why not make my own?


They were very simple to make!
I used 20 gauge silver colored beading wire.
I cut off even lengths of the wire.
I strung my beads onto the wire.
For the longer charms, I used headpins and then attached them to the wire.
I made a loop on one end of the wire.
The other end I slightly bent so that it would catch in the loop.
I then rounded the wires and hooked them together!

They are all ready to keep your drink noticeable from others!

Many wine charms available in my Etsy shop
http://www.CreationsByKT.etsy.com

Monday, January 28, 2013

Baby Crib

I found a very cute set of baby stickers.
The sheet consisted of a crib, a mobile, and several other small accents.
I bought it with the thought to make a card with them.
This is what I came up with:


I based all my embellishments off of the colors in the crib sticker.
I picked a striped paper that had blues, greens, and yellows in it.
I cut two strips of it and glued them on either side of the card.
I then centered the crib at the bottom of the card,
placing the mobile sticker above it.
I used adhered plaid bows to the bumper of the crib.
I placed yellow pearl stars on top of the bows.
On the mobile, I adhered several pearl stars to make it more three-diminsional.

Cards such as this one are available in my Etsy shop
http://www.CreationsByKT.etsy.com

Sunday, January 27, 2013

Teal and Brown

I have had these really pretty teal and brown flower beads for awhile.
I have also had brown wooden flower charms for awhile.
I loved both of these, but could never figure out what to make with them.
Then I realized, I should put them together!


I loved how they turned out!
I used beading wire to make these earrings.
I strung the wooden cross charms onto the middle of the wire.
I pulled both sides of the wire together to thread the teal pearl like bead
onto both strands at once.
I then separated the two ends, stringing teal seed beads onto each strand.
I brought the stands back together to string the flower on.
Separating the strands again, I strung more teal seed beads.
I brought the strands back together one last time to add one more teal pearl like bead.
I used a wire crimp to finish the earrings off and hook onto fishhook earring backs.


Earrings such as these are available in my shop
http://www.CreationsByKT.esty.com