Showing posts with label scrapbooking. Show all posts

Saturday, July 13, 2013

Patriotic Blog Hop


Welcome to the July 13th Patriotic Blog Hop hosted by www.thecricutchirp.com. If you’re just joining the hop, make sure to start back at the beginning at http://www.thecricutchirp.com. We hope that you enjoy hopping along with us as much as we enjoyed putting our projects together for you.


Here’s the line up…


For my patriotic project, I decided to make a new background for my menu board.
If you're new to my blog, I make a new background for my menu board every month.

A menu/message board is easy to make on your own!
All you have to do is get a frame in the size you wish, and start designing backgrounds to fit it!
The glass works as a dry erase board!

Here is the patriotic themed background that I made for July:


I started with the blue star scrapbook paper. I then stacked a 4th of July sentiment paper on top, and then a cream colored paper on top of that. (I always try and use some type of solid paper somewhere in my board so that the writing will show up when writing on the board). I then used photo corners on either side of the cream colored sheet. I used a flag sticker on the cream colored sheet as well. I had chipboard stickers in the sentiments "patriotic" and "freedom" that I used to decorate. I used letter stickers to make "USA". I shaded the edges with a black pen (on the USA) to make it stand out against the background.

Thanks for looking! I hope you enjoyed my project.

Make sure to hop all through the blog hop, as there are many great projects and prizes!


Saturday, February 2, 2013

A Gift for my Sweetheart Blog Hop


Welcome to “A gift for my Sweetheart” blog hop.


Sit back and relax while you browse through 17 unique handmade gift ideas to give a loved one on Valentine’s Day. Each stop along the way has a gift they poured their heart into but that doesn’t mean the project contains the traditional Valentine heart theme.

The hop started at Christine’s blog http://hotberrydesigns.blogspot.com/ if you didn’t come from Http://papershenaniganz.blogspot.com
 be sure to start at the beginning so you don’t miss out on the inspiring ideas.

For this hop we have 2 sponsors, in order to be entered in the drawing for the 2 prizes you must comment and follow each blog.


Hot Berry Designs
$10 gift certificate


Scraptastical Kreations
$15 gift certificate

You have Saturday and Sunday to hop and leave a comment at all the blogs for your chance to win. The winners will be randomly chosen Monday Jan 4th  and will be announced on Christine’s blog http://hotberrydesigns.blogspot.com/


Robert and I like to keep a weekly menu.
We are trying to eat healthier and this helps us stay on track.
It also helps us with planning grocery shopping trips and staying within budget.
So, for my project, I created something for the both of us for Valentine's Day.
I created a Valentine's theme background for our menu.


The menu is made from a 12x12 frame.
Glass works great with dry erase markers, so this works great as a menu that you can change the background on!

I started with a fun, vintage Valentine's paper for the background.
I then placed a red square of cardstock in the center to have a solid section.
This solid section really helps when writing on the menu, making it a lot easier to read.
I had love themed alphabet stickers that I used to created the titling "Menu".


I stamped kissing deer onto a tag.
I colored the little hearts on the back with a red marker.
I tied the tag with white and gold twine.


Vintage looking cardstock adorns the lower left corner.
Cardstock sticker punch out reads "LOVE".
Gold sequins ribbons runs to the right and above of the sentiment.
Vintage little Valentines girls are decorating the sentiment "LOVE".


Thank you for stopping by the next stop is Claire at http://threewaterscreations.blogspot.com/


Lissa Marie  www.somanycrafts.com


Wednesday, January 30, 2013

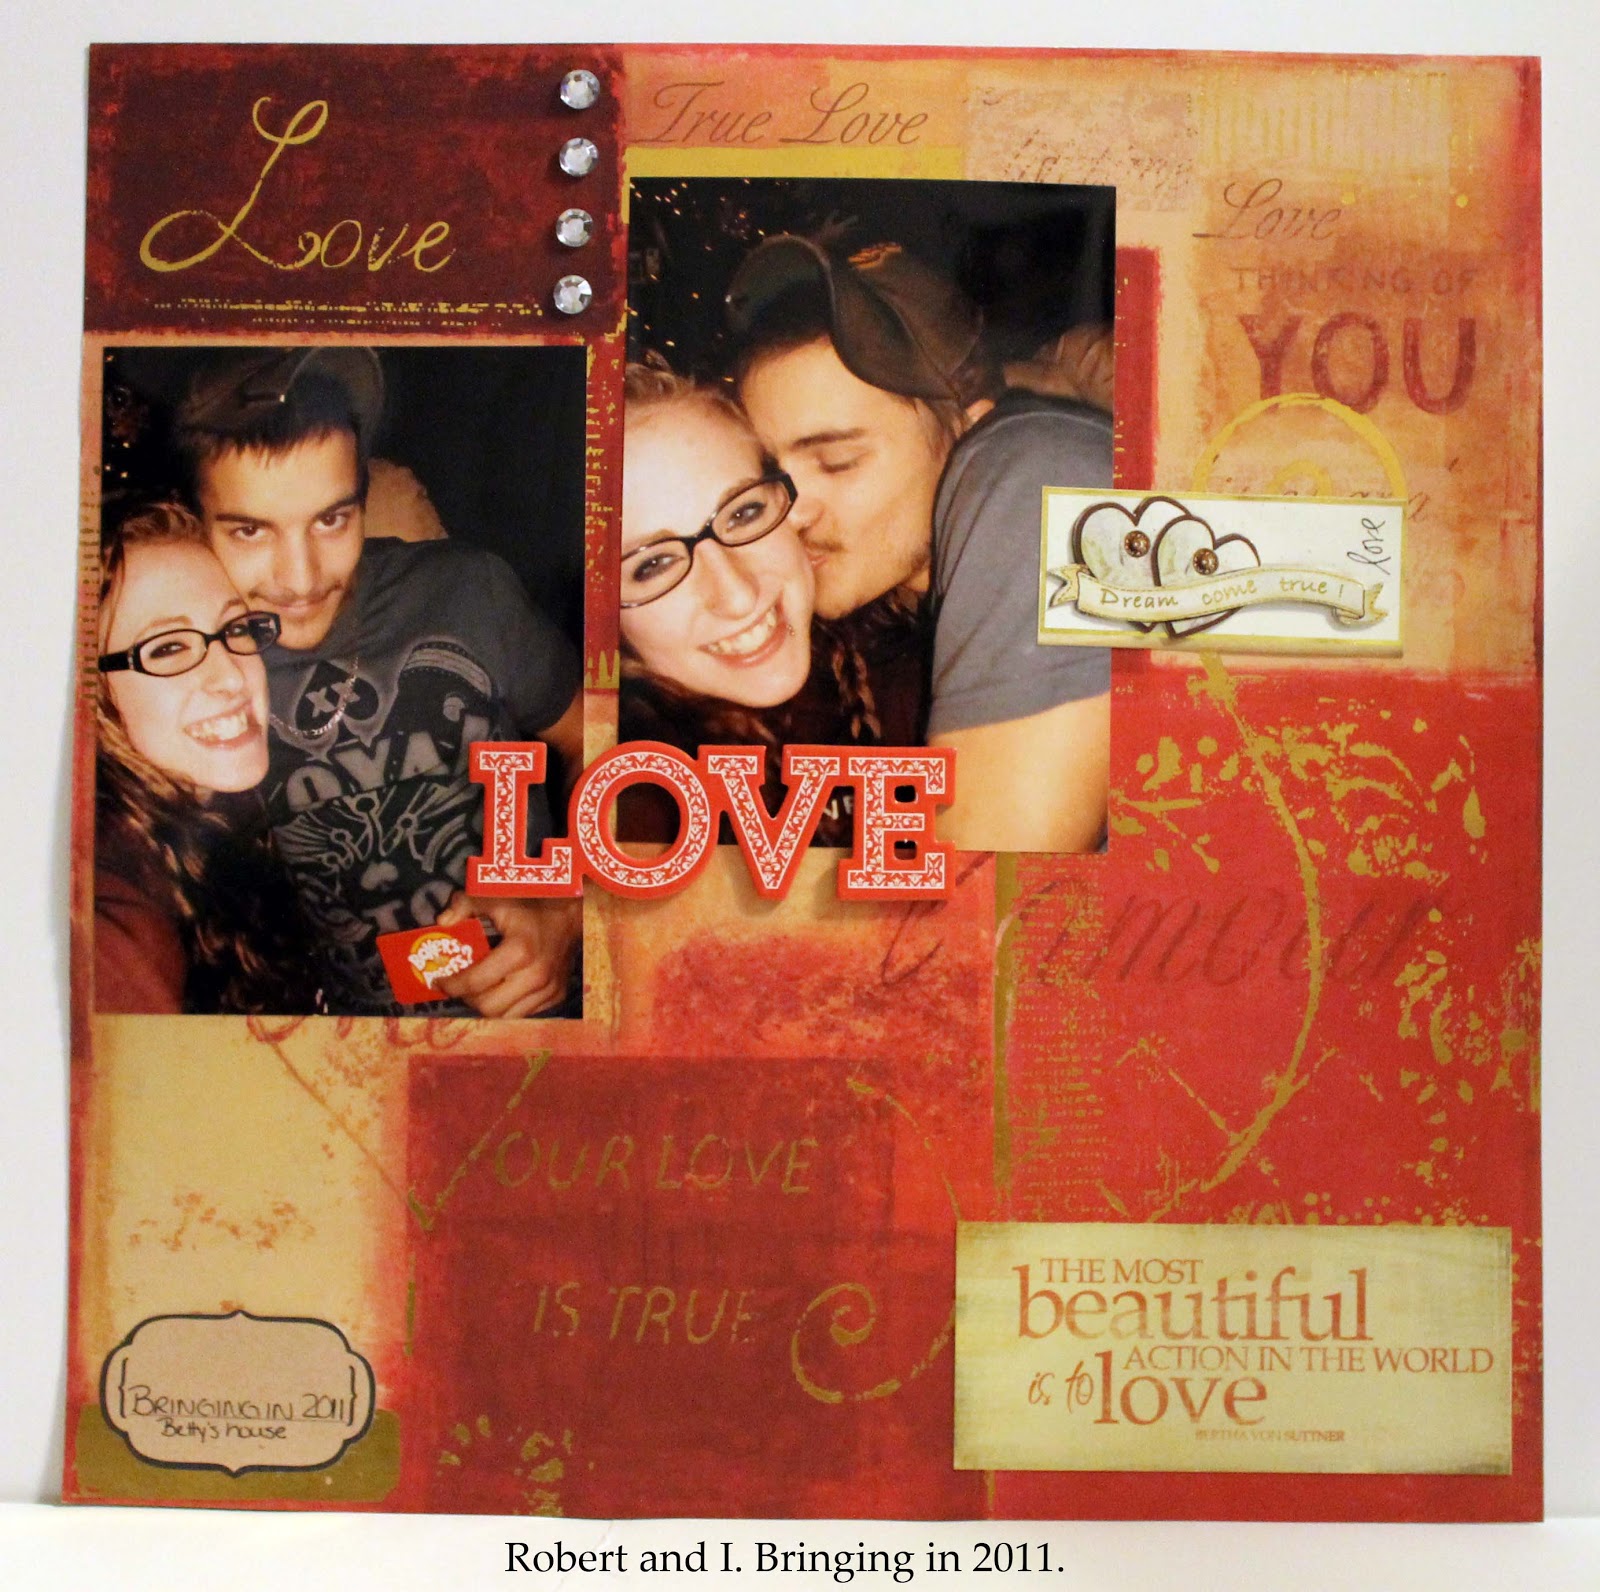
Scrapbooking Page - Bringing in 2011

I have A LOT of scrapbooking to catch up on!
The page I am sharing with you today is one that I created using pictures from New Year's 2011.


I love those two pictures of us!
You can tell how happy we are!
The scrapbook paper was beautiful as it was, in shades of red and gold,
with gold sentiments
I situated the two pictures using the block like gradients as guides.
I added three clear rhinestones at the top to make the sentiment "Love" stand out.
I added a chipboard cutout across both pictures, "Love".
I added a sentiment to the bottom right "The most beautiful action in the world is to love".
I added a three dimensional sticker coming off of one of the pictures.
"Dreams come true"
I added a tag in the bottom right, "Bring in 2011. Betty's house."

Sunday, December 23, 2012

Ornament Swap

I participated in an ornament swap on Facebook this month.
You could make the ornament out of whatever medium you wanted.

My swap partner wasn't picky and said she would be happy with anything.
So I got a paper mache ornament from Michael's that was round in shape.
I decorated it with scrapbook paper, bling, ribbon, chipboard pieces, and stickers!
I did both sides differently so it was like two ornaments in one!


My swap partner sent me the cutest ornaments in return!
She made me feel special by sending my THREE cute ornaments!!


Aren't they just the cutest?!
Thank you!! :)

Did you make any cute ornaments this year?
Feel free to link to your blog posts with your handmade ornaments in the comments!


Sunday, October 14, 2012

This is a late annoucement, but I made the October Guest Designer Team for Scraptastical Kreations!! For the guest designer, you post four projects a month and participate in challenges. You also comment and interact with all the posts on the group page and the fan page. Here are a couple projects I have done so far with Scraptastical Kreations paper piecing files:
This one I used the KISS Keep It Simple Set - This and That.. I used the butterfly from the set and the ticket.. it turned out to be such a pretty hello card! (Available in my Etsy shop http://www.CreationsByKT.etsy.com )
This one I used the cupcake from the KISS Keep It Simple Set - This and That to make cute cupcake themed birthday tags! (Available in my Etsy shop http://www.CreationsByKT.etsy.com )
I used the bird for this one from KISS Keep It Simple Set - Spring to create a cute little felt bird ornament for Fall. Facebook Fanpage https://www.facebook.com/pages/Scraptastical-Kreations/120204111343309 Website http://www.scraptasticalkreations.com