Showing posts with label diy. Show all posts

Wednesday, October 23, 2013

Harry Potter Bookmark

Need to make a gift for someone?
Does that someone love books?

Well that was the situation I was in for my Dad...
And I decided to make him a Harry Potter bookmark out of felt!
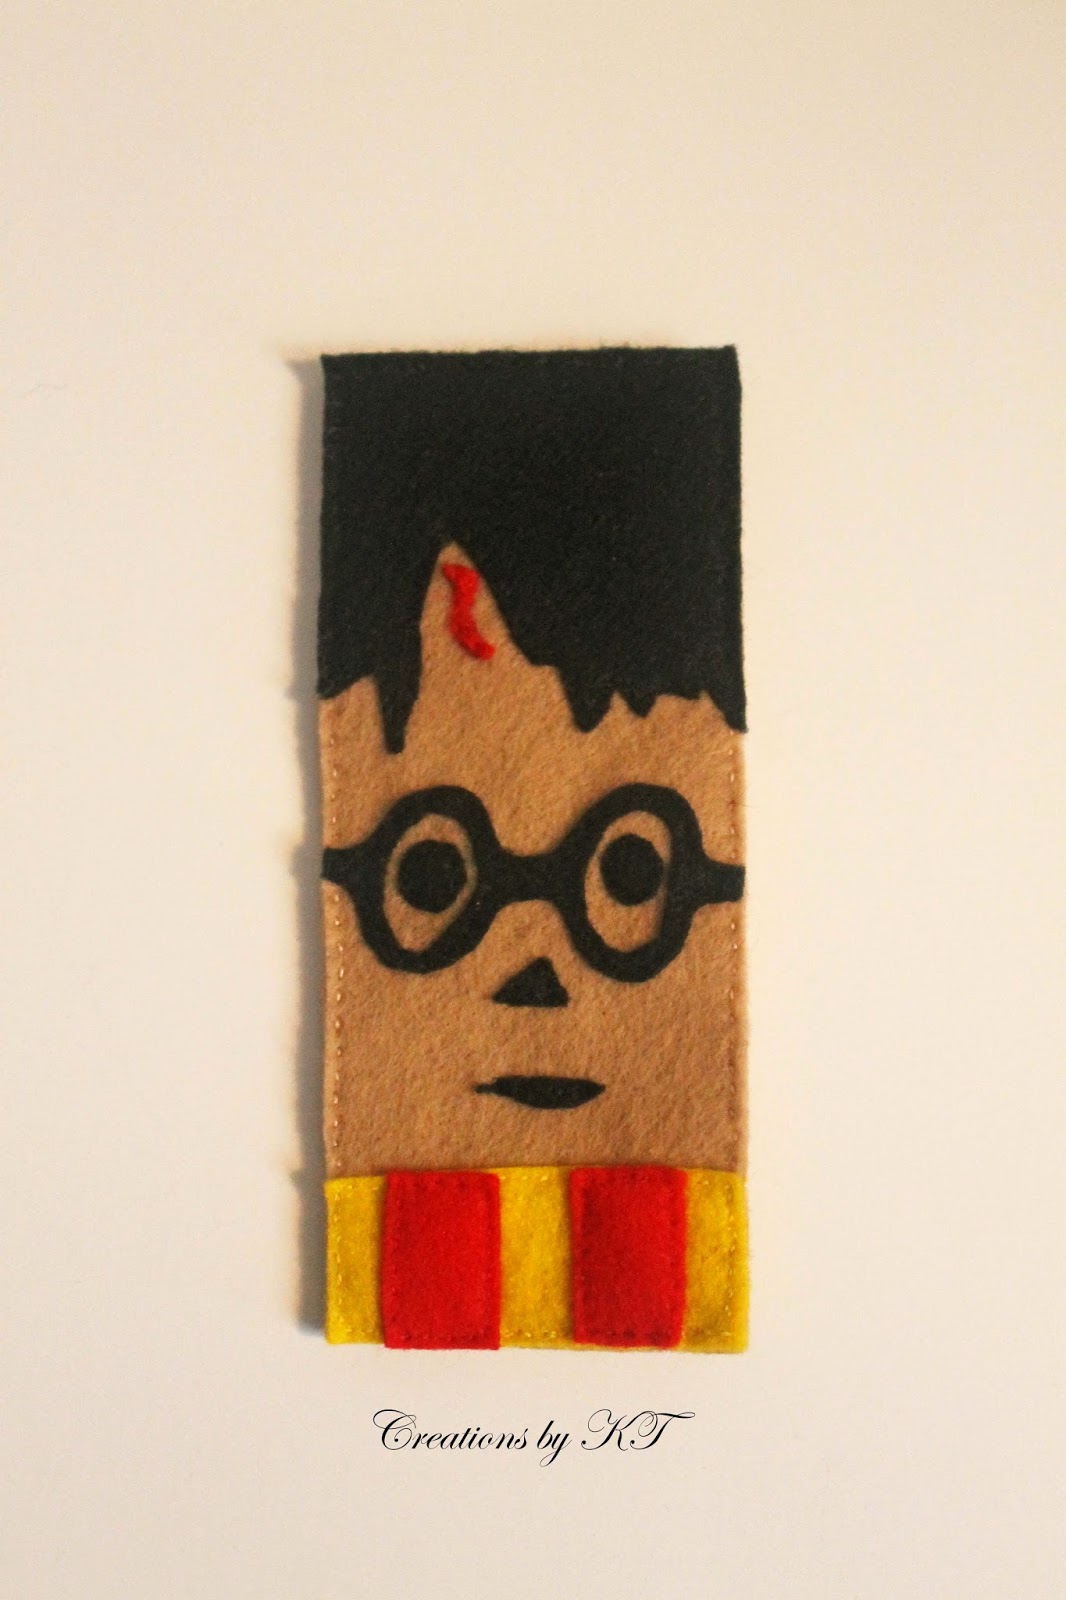

I started with a rectangle piece of flesh-tone felt.
I then cut out hair, glasses, eyes, a nose, and a mouth out of black.
Out of red I cut a lightening bolt scar and to rectangles for the scarf.
Out of yellow I cut a large rectangle for the scarf.
I hand stitched everything down with coordinating embroidery floss.
I then finished it off by stitching on another rectangle piece of flesh-tone felt on the back to cover up all of the other stitches and knots.


Now you have a gift perfect for book lovers!
Tailor it to fit their likes!

Thursday, October 3, 2013

Pirate Necklace

This is necklace two of three that I told you that I made for myself this past weekend.


This one has a pirate theme.
The sword and skull are actually two charms that my boyfriend bought me about three years ago!
(I told you I barely ever make anything for myself!)
So I happy that I finally made a necklace with them!
I think this one is fun and I can't wait to wear it.
The beads help to jazz it up a bit.

Thanks for looking!

Wednesday, October 2, 2013

Slay Your Own Dragons

If you're a crafter, then you know how rare it is to make something for yourself.
Well, I finally did! Yay!
I have so many cute ideas for necklaces for myself, I just never get around to making them.
I made three necklaces for myself this past weekend!
Here is one of them:


I saw these two charms and knew they went perfect together!
They are both charms from the Fairy Tale line.
I used a head pin to attach the dragon on so that it would hang longer.
I also added a black rhinestone charm at the top.
I am happy with how this turned out!

Now go out and slay your own dragons!

Friday, September 20, 2013

Bathroom Shelf

I was getting tired of all the clutter of products on my bathroom shelf.
All of the shelfs at the store were kind of pricey, and there weren't any that I was particularly fond over to pay that kind of price.
I decided to go to the craft store, buy a cheap wooden shelf, and paint my own.


I used acrylic paints.
I painted everything a base coat of white first so that the colors would show up better.
The front has three wooden cut outs that I glued on - two anchors and a skull.
I hot glued them on after everything was painted and sealed.
I painted the cut outs first.
I then started on the shelf itself, painting some areas white and some with a black that had glitter in it.
I then painted a skull with an anchor through it on either side of the shelf.
I sealed everything.
Then the last step was to hot glue the cut outs on.
Now it is happily hanging on the wall in my bathroom, freeing up counter space!


P.S. 
- The sneak peak for my next blog posting is the night light that's underneath my shelf!
- (And please excuse the ugly wallpaper, I live in an apartment!)

Wednesday, September 4, 2013

Superman Flower Pot

My Mom and younger brother just moved to a new house.
I had given my Mom several things but was trying to come up with something for my brother.
He absolutely loves Superman.
I have been wanting to try painting flower pots and had bought a smaller one to try before painting bigger ones.
I decided to try painting the smaller one in a Superman theme for my brother.


I love how it turned out!
I made it kind of look like Superman himself, just a portion.
I figured the smaller flower pot would be perfect for change or odds and ins.
My brother really liked it!

Now I am off to paint more!

Tuesday, September 3, 2013

Stashing through the Snow

I know it is only September, but I have started working on Christmas presents!
Those of ya'll who are crafty and make your own gifts know that starting early is key!
This year I have decided to try my hand and painting glass ornaments.
Here is my first one:


This mustache inspired ornament is for my best friend.
I started with a clear glass ornament and painted it white.
I then painted a black mustache on it and painted the quote on.
Ta da, a cute ornament for her tree!

I can't wait to give this to her!!

If you like this, make sure to subscribe, because I have many more ornaments and hand painted and handmade gift postings coming up!

Saturday, July 13, 2013

Patriotic Blog Hop


Welcome to the July 13th Patriotic Blog Hop hosted by www.thecricutchirp.com. If you’re just joining the hop, make sure to start back at the beginning at http://www.thecricutchirp.com. We hope that you enjoy hopping along with us as much as we enjoyed putting our projects together for you.


Here’s the line up…


For my patriotic project, I decided to make a new background for my menu board.
If you're new to my blog, I make a new background for my menu board every month.

A menu/message board is easy to make on your own!
All you have to do is get a frame in the size you wish, and start designing backgrounds to fit it!
The glass works as a dry erase board!

Here is the patriotic themed background that I made for July:


I started with the blue star scrapbook paper. I then stacked a 4th of July sentiment paper on top, and then a cream colored paper on top of that. (I always try and use some type of solid paper somewhere in my board so that the writing will show up when writing on the board). I then used photo corners on either side of the cream colored sheet. I used a flag sticker on the cream colored sheet as well. I had chipboard stickers in the sentiments "patriotic" and "freedom" that I used to decorate. I used letter stickers to make "USA". I shaded the edges with a black pen (on the USA) to make it stand out against the background.

Thanks for looking! I hope you enjoyed my project.

Make sure to hop all through the blog hop, as there are many great projects and prizes!


Friday, July 12, 2013

Happy Birthday, for a Guy!

For us card makers, we all know it is harder to make cards for guys.
I came up with a great, fun card for a guy though!


I used the scrapbook paper as my inspiration and built off of that.
I cut and glued that down.
I then ran washi tape across the top and the bottom of the card.
I took a tag and added a mustache sticker and stamped "sending you birthday wishes".
I then added 3D dots on the back and placed it on the center of the card.
I had some cute tiny washers that worked perfect with this card,
so I used glue dots and adhered three on either side of the card!

Ta da, a great guy card!

This card, and many more, are available in my Etsy shop
http://CreationsByKT.etsy.com

Tuesday, June 25, 2013

Star Necklace

Today I am sharing with you a project that I had made for my sister for her birthday.
She wears a lot of blacks, greys, and white when she goes out with her friends on the weekends.
She also likes when I make her jewelry.
So, I thought I would combine those two things and make her a necklace to wear on her nights out!


I found this star pendant awhile back with her in mind, so I new that it would fit with the theme I wanted to go with.
I then did a double strand necklace, one with mainly black seed beads, 
the other with a grey/silver color seed beads. 
I used several different accent beads in black, white, and grey to make the necklace "pop".

Monday, April 15, 2013

April and May Dry Erase Menu

I decided to combine the months of April and May on my dry erase menu and use the quote "April showers bring May flowers" to build upon.

If you would like a background on my dry erase menu,
you can view my first blog post on it here:
http://ktscreativeinsights.blogspot.com/2013/01/dry-erase-menu.html


I used a Spring themed 12x12 scrapbook sheet for the background.
I then used a 8x8 sheet for the foreground.
I picked something that had some decoration but was mostly plain in the center so that the menu would be easily read.
I used my Cricut to cut out the letters for the headline
"April Showers Bring May Flowers"
and glued the letters on.
I used paper flowers to accent the headline and the 8x8 paper,
using glittered brads to hold them together and then glue dots to hold them to the paper.

That's our menu for the month of April and May! :)

Sunday, April 14, 2013

Spring Time Necklace

I have had this gorgeous flower charm sitting in my box for awhile now.
Now that Spring is here I thought it would make a great Spring time necklace.


I started by picking three colors of seed beads to match the colors in the charm.
The charm is silver colored in background, with a gold color and bronze color for the flowers.
The flowers are accented with clear stones.
Pulling from those colors, I used grey/silver seed beads, brown/bronze seed beads, and yellow/gold seed beads. I strung one strand of each.
The strands are loosely braided together.

The necklace measures apx. 20" long (not including charm).
The charm is apx. 1.75" long, including the bail, and 0.5" wide.
It is a charm that is from one of the lines put out by Hirschberg Schutz & Co., Inc.

This necklace and more are available in my Etsy shop
http://www.CreationsByKT.etsy.com

Sunday, February 10, 2013

Blue Felt Tree

Robert's Mom's birthday was last month and I wanted to make her something unique.
I have had these styrofoam cones that I had been wanting to try crafting with.
 Browsing through Pinterest, I saw quite a few different ideas for trees made from them.
Using those for inspiration, I came up with my own tree idea.


I took the base of a ribbon container and traced circles onto two different shades of blue felt.
I cut the circles out and then attached them to the styrofoam cone,
using sequins pins.
I alternated between putting a seed bead a sequins on the sequins pin and putting a seed bead and a button on the pin.
I found those cute, sparkly blue birds in the dollar bins at Michael's.
I thought they would be a great touch to this project!
I adhered them with glue dots!


Saturday, February 9, 2013

Valentine's Day Blog Hop


Welcome to the Valentine's Day Blog Hop!
We are glad that you could join us!
We are celebrating Valentine's day with projects that were made without the traditional colors of pink or red.
If you happened upon my page and would like to join in from the beginning, please visit Suzanne at http://www.zannieberry.blogspot.com
If you have come from Anita's blog them you are in the right place.

The grand prize today is being sponsored by Zannie Berry Scrapbooking. (www.zannieberry.blogspot.com)


In order to win, make sure to comment at each stop along the way!

It is not required that you become a follower of each blog, but we would love if you did!

The project I am sharing with you is a gift I made for my boyfriend, Robert.
He loves penguins.
Last year I crocheted him one.
This year I decided to make him a unique one out of sequins!


This cute little guy started out as just a plain styrofoam ball.
I then took sequins pins, added white seed beads and white sequins.
I pinned them in an oval onto the ball to make the stomach area.
I covered the rest of the styrofoam ball with sequins pins with black seed beads and black sequins.


I then cut the feet and beak out of orange felt.
The wings I cut out of black felt.
I adhered them to the penguin with plain sequins pins.
I attached google eyes with glue dots.


I hope you enjoyed my project!

Your next stop in the hop is Claire at http://threewaterscreations.blogspot.com/

Blop Hop Line Up


Saturday, February 2, 2013

A Gift for my Sweetheart Blog Hop


Welcome to “A gift for my Sweetheart” blog hop.


Sit back and relax while you browse through 17 unique handmade gift ideas to give a loved one on Valentine’s Day. Each stop along the way has a gift they poured their heart into but that doesn’t mean the project contains the traditional Valentine heart theme.

The hop started at Christine’s blog http://hotberrydesigns.blogspot.com/ if you didn’t come from Http://papershenaniganz.blogspot.com
 be sure to start at the beginning so you don’t miss out on the inspiring ideas.

For this hop we have 2 sponsors, in order to be entered in the drawing for the 2 prizes you must comment and follow each blog.


Hot Berry Designs
$10 gift certificate


Scraptastical Kreations
$15 gift certificate

You have Saturday and Sunday to hop and leave a comment at all the blogs for your chance to win. The winners will be randomly chosen Monday Jan 4th  and will be announced on Christine’s blog http://hotberrydesigns.blogspot.com/


Robert and I like to keep a weekly menu.
We are trying to eat healthier and this helps us stay on track.
It also helps us with planning grocery shopping trips and staying within budget.
So, for my project, I created something for the both of us for Valentine's Day.
I created a Valentine's theme background for our menu.


The menu is made from a 12x12 frame.
Glass works great with dry erase markers, so this works great as a menu that you can change the background on!

I started with a fun, vintage Valentine's paper for the background.
I then placed a red square of cardstock in the center to have a solid section.
This solid section really helps when writing on the menu, making it a lot easier to read.
I had love themed alphabet stickers that I used to created the titling "Menu".


I stamped kissing deer onto a tag.
I colored the little hearts on the back with a red marker.
I tied the tag with white and gold twine.


Vintage looking cardstock adorns the lower left corner.
Cardstock sticker punch out reads "LOVE".
Gold sequins ribbons runs to the right and above of the sentiment.
Vintage little Valentines girls are decorating the sentiment "LOVE".


Thank you for stopping by the next stop is Claire at http://threewaterscreations.blogspot.com/


Lissa Marie  www.somanycrafts.com


Tuesday, January 29, 2013

Wine Charms

Wine charms can be very expensive and it can be hard to find really cute one!
I love making jewelry and work well with beads and wires...
so I though, why not make my own?


They were very simple to make!
I used 20 gauge silver colored beading wire.
I cut off even lengths of the wire.
I strung my beads onto the wire.
For the longer charms, I used headpins and then attached them to the wire.
I made a loop on one end of the wire.
The other end I slightly bent so that it would catch in the loop.
I then rounded the wires and hooked them together!

They are all ready to keep your drink noticeable from others!

Many wine charms available in my Etsy shop
http://www.CreationsByKT.etsy.com